Build a Fast, Free Image Host with PicList + Cloudflare R2
Before You Start
PicList already works well with Cloudflare R2, but the first setup can still be confusing:
- There are quite a few fields, so it is easy to put a value in the wrong place.
- PicList does not provide a connection-test button for this setup.
- The simplest way to confirm everything is correct is to upload a real image.
This guide walks through connecting PicList to Cloudflare R2 and using it as a fast image host with CDN delivery.
If you have not created the R2 bucket yet, this guide can be used as a reference:
PicList version used in this article: v3.5.0 (July 2026).
I recently moved the images used by this blog to Cloudflare R2 and paired it with PicList. The result has been very good:
Advantages:
✅ Free ✅ Stable ✅ Fast ✅ Custom domain ✅ Global CDN acceleration ✅ No load on a VPS
Configure PicList
- Image Host: used to upload images.
- Cloud: used by PicList to access the Cloudflare image bucket.
Image Host Configuration
In the left navigation, open Image Host → AWS S3 → Add Configuration:
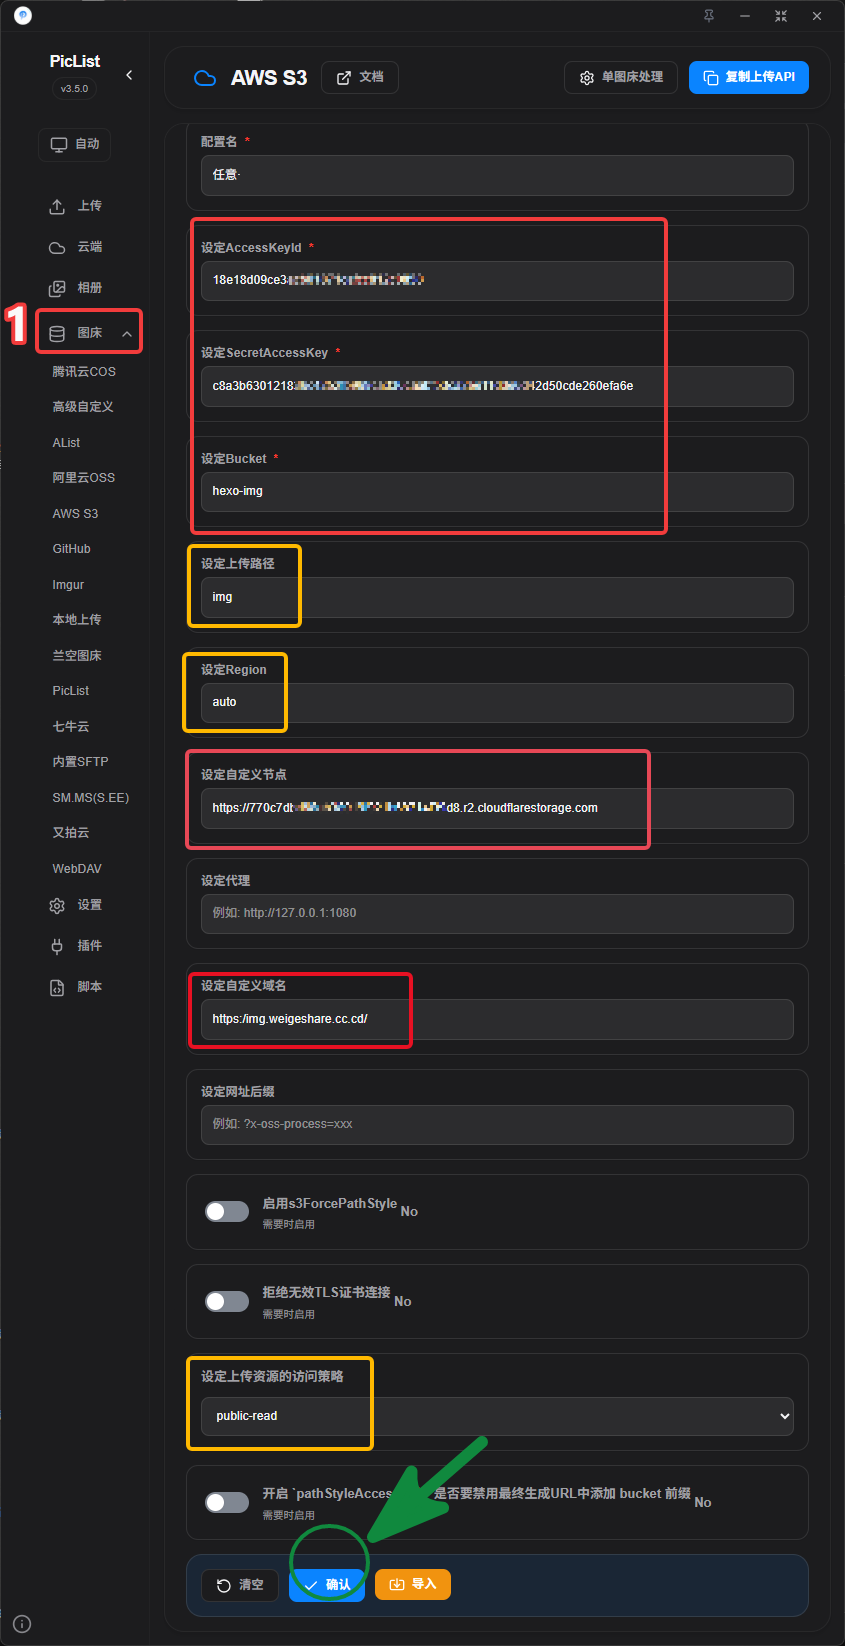
Required Fields
● Configuration name: anything you like
● AccessKeyId: 18e1************************c0858
● secretAccessKey: c8a3********************************************************fa6e
● Custom endpoint: https://770*************************39d8.r2.cloudflarestorage.com
You can obtain all of these from this API screenshot.
- Permission: Admin Read & Write (otherwise PicList Cloud access will fail).
- The credentials are displayed only once. Save them, or you will need to create them again.
● Bucket: my bucket is hexo-img. Screenshot
Optional Fields
■ Upload path: / (root directory)
I want files under the img directory, so I use /img/. Screenshot
● Custom domain: https://img.weigshare.com/
(You can set this after binding a domain. Uploaded files will then use links under that domain.) Screenshot
https://img.weigeshare.com/img/x.png☐ Without a custom domain, you may get a link like this, which may not open directly:
https://770*************************39d8.r2.cloudflarestorage.com/img/0.%E5%B1%8F%E5%B9%95%E6%88%AA%E5%9B%BE%202026-07-08%20181820.png☐ Region: auto (or us-east-1)
- Upload object ACL: public-read (officially recommended)
Cloud Configuration
In the left navigation, open Cloud → S3 API → Add Configuration → Save:
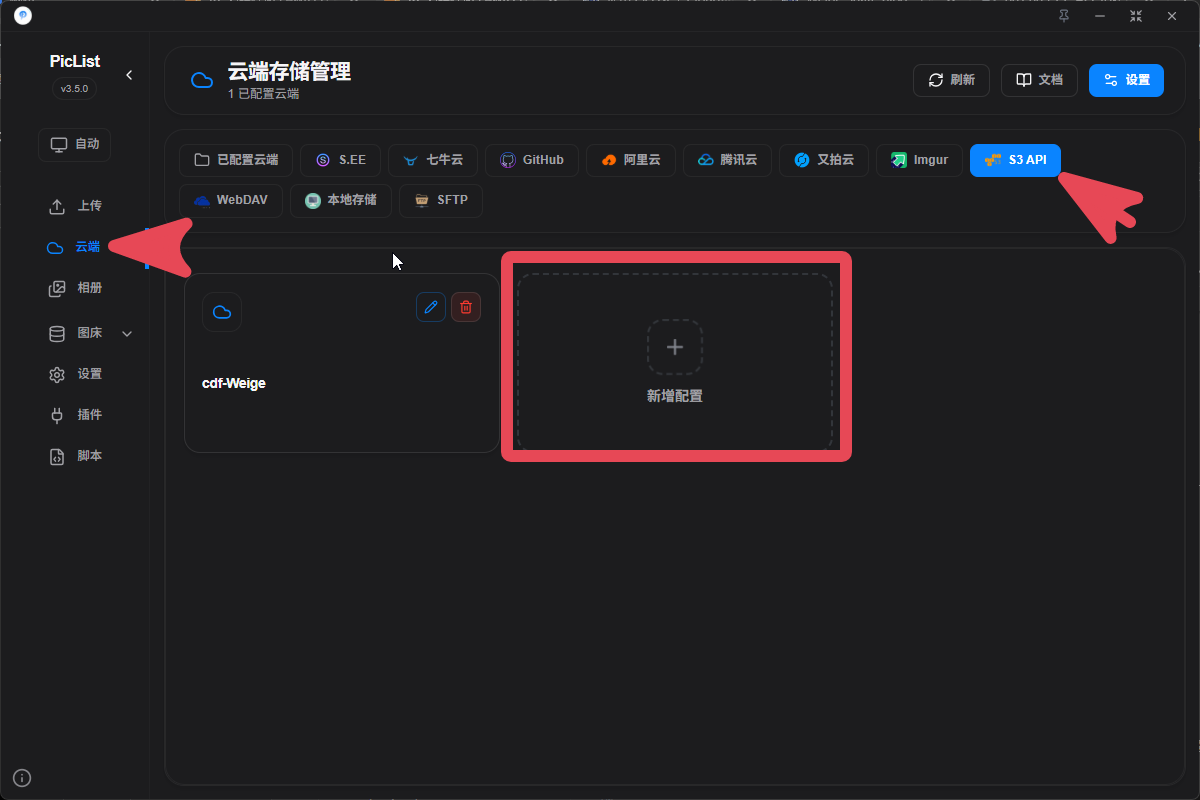
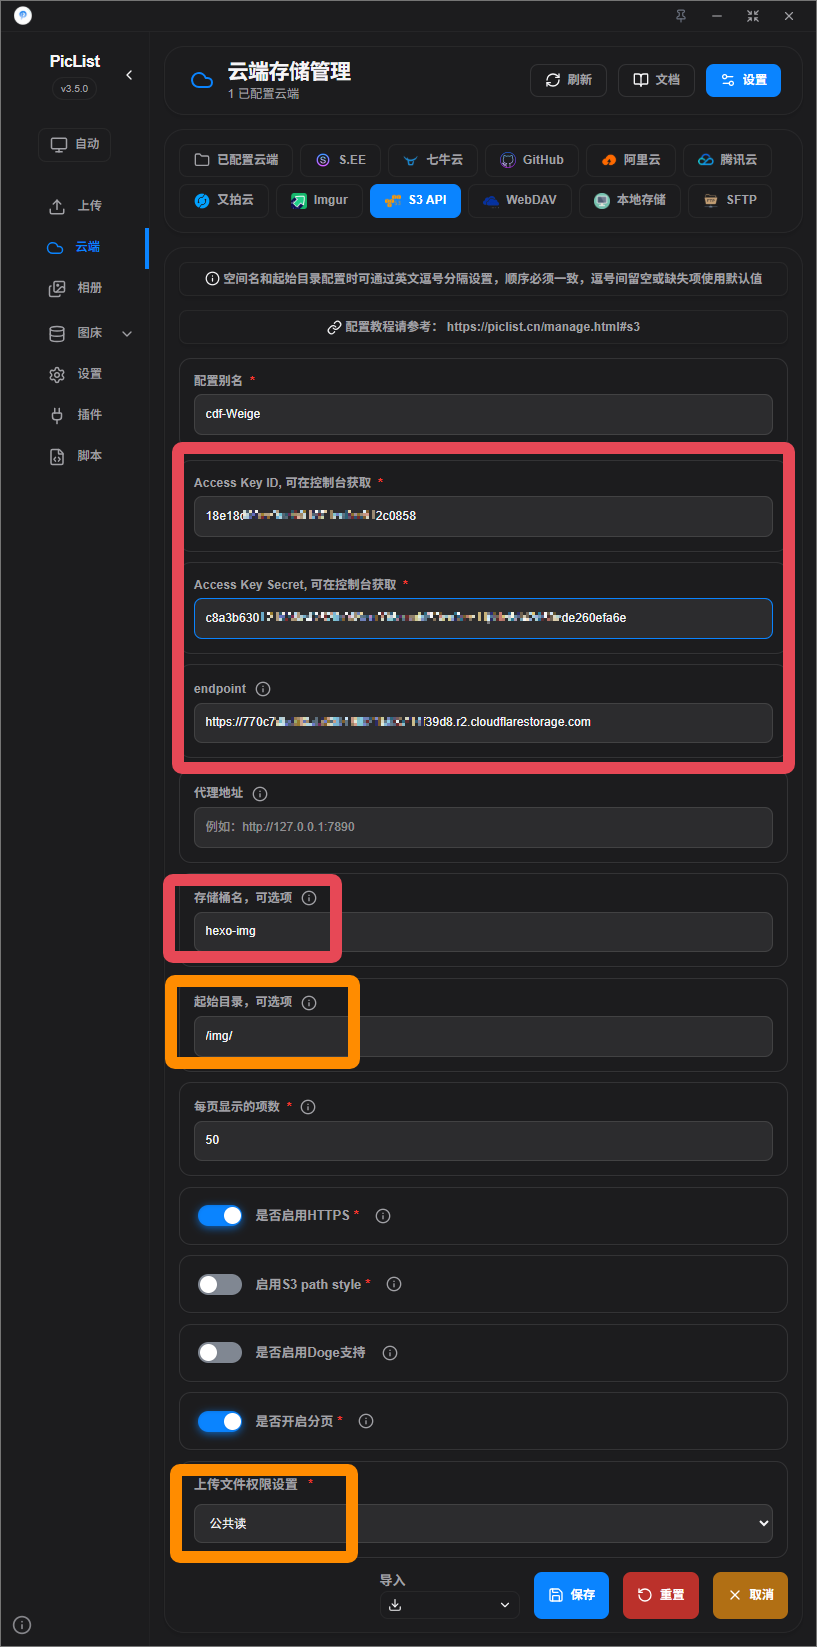
Required Fields
● Configuration name: anything you like
● Access Key Id: 18e1************************c0858
● Access Key Secret: c8a3********************************************************fa6e
● endpoint / custom endpoint: https://770*************************39d8.r2.cloudflarestorage.com
Get the API token here: API.
- Permission: Admin Read & Write (otherwise PicList Cloud access will fail).
● Bucket name: hexo-img. Screenshot
■ Starting directory: /
- I store files under /img/: Screenshot
Optional Fields
■ Uploaded-file permission: public-read (public read, officially recommended)
FAQ
Upload succeeds, but the image does not open
Check:
- Whether the bucket allows public access.
- Whether the custom domain has been bound.
- Whether DNS has propagated.
AccessDenied
Check:
- Whether the Access Key ID is correct.
- Whether the Secret Access Key is correct.
- Whether the API token has read/write permission.
SignatureDoesNotMatch
Check:
- Whether the endpoint is correct.
Summary
My current blog stack:
Hexo + Butterfly + Github + Cloudflare R2 + Cloudflare CDNIf you are looking for a stable, long-term image-hosting solution for a blog, PicList + Cloudflare R2 is well worth trying.